The Peghead Inlay:
Now it was time to work on the inlay for the peghead. I decided to do the same "Matsushita" kanji characters that I did on my tenor ukulele.
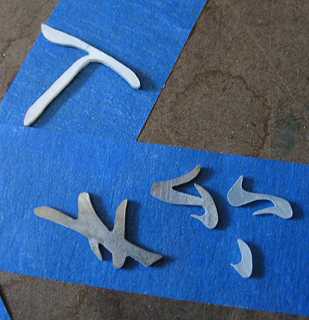
First I printed the characters onto sticky label paper, and then placed those onto the mother of pearl inlay blanks. Here is my inlay sawing board and jeweler's saw, ready to start sawing away!!!

|
|
Here are the five pieces after I've sawn them out and smoothed out the edges with some needle files.
|
|
I am going to surround the inlay pieces with black epoxy (it makes a nice contrast and is much easier than trying to rout precisely for just the inlay pieces!). So, first I temporarily stuck the inlay pieces into their proper position on the peghead, and then drew the surrounding outline for the epoxy-filled border. I removed the inlay pieces and routed out the cavity.
|
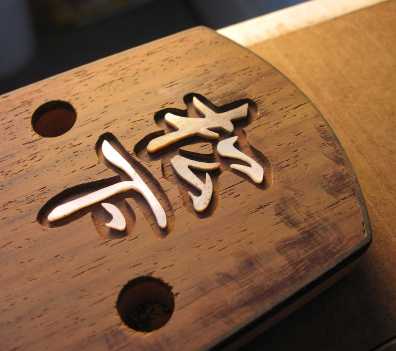
I then placed the inlay pieces into the cavity, positioning them so that they looked good.
|
|
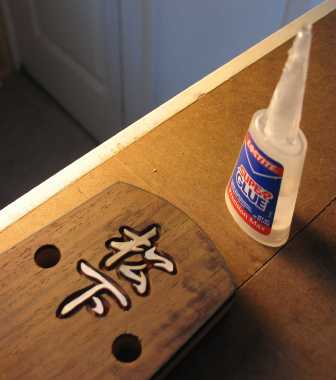
Here I have super-glued the inlay pieces into the cavity.
|
|
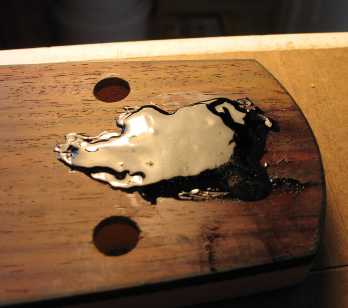
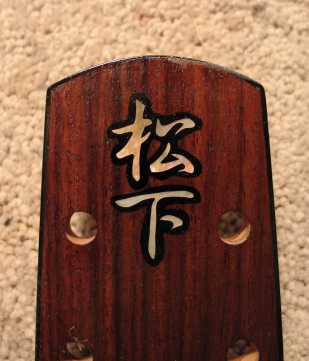
5-minute epoxy was mixed, and black tint was added to it. I filled (actually ended up totally covering) the cavity with the black epoxy. After an hour or so, this mess . . . . .
. . . . . was scraped and sanded away, to reveal THIS:
|
