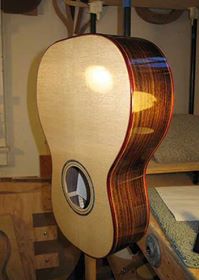
I have never done a French polish before, but have always wanted to try this finish. Even though it's not as durable a finish as lacquer, the fact that its film thinness is supposed to bring out more of the sound of the top appealed to me. My little Size 5's top already has a really nice tap tone, so I am curious to see whether the French polish will enhance that even more. And the fact that this is such a smaller-sized instrument makes this process a little less intimidating to try out. I also really like the more "organic," hands-on feel to this method of finishing --- no spray equipment to have to pull out and clean. AND, another factor was the fact that right now I have a rotator cuff problem with my left shoulder, so holding up the guitar with my left arm while I spray with my right would have been very, very difficult.
I took ideas from all over the place -- Ron Fernandez's video, Robbie O'Brien's online French polishing course, YouTube videos (Michael Thames, Richard Howell, Brian Forbes, some guy named Rick on "buildaguitar", Steve Dickie, WeepingZeeGuitars), Orville Milburn's tutorial. There were so many methods, at first it confused me; I just ended up trying to figure out what the most common practices were, and then just trying some of them. (At some point, you have to just stop reading/watching, and just DO it yourself!)
|
|
Here are my tools: 2-pound-cut shellac (made from flakes), Everclear grain alcohol, walnut oil, a traditional "muñeca" (made with wool from an old sock and linen from an old shirt), and, finally, an Artgum eraser wrapped in 3 layers of cheesecloth.
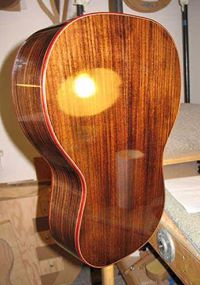
My basic method was to put a few drops of shellac and alcohol on the muñeca pad, tap it a few times against the back of my hand, and use non-stop circular motions to apply the shellac to the surface, looking for that tell-tale "vapor trail" following behind the stroke. After covering the entire surface with these circular motions, I would apply lengthwise strokes, along the grain, making sure to kind of "swoop down" and "lift off" at the beginning and end of each stroke; this would get rid of the swirl marks left by the circular motions.
Whenever the pad started to feel as if it would stick to the surface, I put a drop of walnut oil on the muñeca, to help the pad glide on the surface. A little while after each "bodying" session, I would apply lengthwise strokes again, this time solely with alcohol on the pad, to get rid of any oil left on the surface.

|
|
Friday, June 14th, 2013:
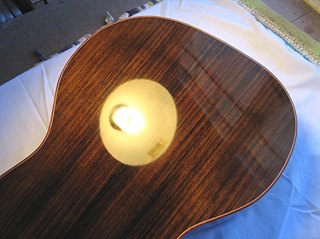
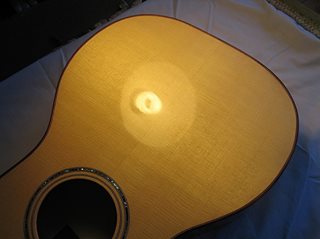
Have been working on the French polishing of my little Size 5 guitar this past week. It's the very first time I've tried this process, and I'm really liking the hands-on process! However, ran into my first problem a couple of days ago --- in trying to use pumice to fill some pores (after laying on the 4th FP coat), I managed to create a little 1" by 1/2" "crater" in the finish! I put a query out in a luthiers' forum for suggestions on how to fix it, and today I tackled the fix, after waiting a couple of days for the finish to harden some more. Working really slowly and lightly, I used walnut oil & 1800-grit Micromesh to level down the area around the crater, followed by one coat of the FP; it took me an hour to do it, but it came out well! (Relief.)
|
|
Here it is, with the "crater" gone:

|