April 2013:
After taking a little break from the building (I had finished my last instrument --- the Weissenborn --- in mid-January), I got started on the Size 5. This, I think, is my 5th one. My own personal Size 5, I had given away back in December 2012, as a gift to my church's Worship pastor, when he returned home to Guatemala. Since I started really missing this little-sized guitar, I decided to build another. Hopefully, I'll keep this one!
Since I'd already detailed the construction of a Size 5, in 2009, I decided not to post the building of this one on my website, as it would be pretty much a redundant account. However, I did occasionally post some photos on my Facebook page. Here, basically, are those same photos and descriptions, taken directly from my Facebook pages.
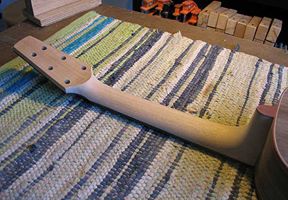
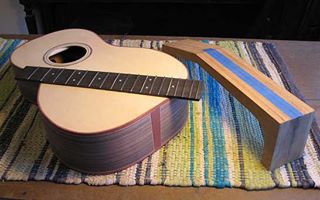
Here's a photo of where I'm at now, in this build; the soundbox and fingerboard are done, and the rough neck blank is cut. Next...adjusting the neck angle so I can drill for the threaded inserts in the heel.
|
|
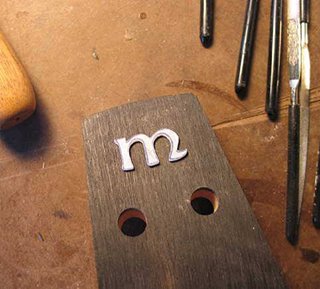
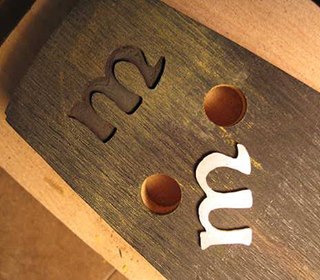
NEXT TASK: Inlaying my logo on the peg head: Just spent 1-1/2 hours sawing out this little "m" out of mother of pearl. Now it's soaking in hot water, to release the paper drawing that's superglued to the inlay. Next, I will scribe the inlay's outline onto the peghead and rout out the cavity (the more difficult job) with my Dremel.
After that, I can set the neck angle and carve out the neck!
|
|
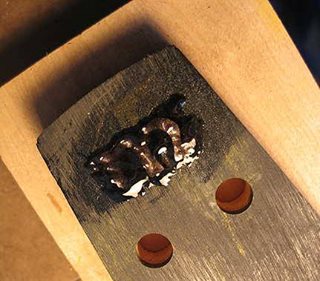
TWO HOURS LATER... Just spent a couple of hours routing out the cavity for the peghead inlay. Don't worry about the gaps -- they become nearly undetectable when filled with epoxy & ebony dust! (Second photo is the mess that will become beautiful after I scrape the cured epoxy off.)
|
|
|
|
|
|
BACK TO THE GUITAR...
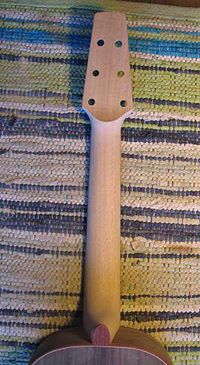
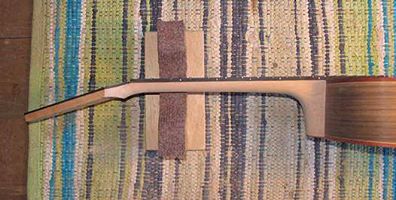
After almost a week of not working on the guitar, I got back to it today. This morning, I filed flush & beveled the fret ends on the fingerboard, and filled the tiny fret-end slot gaps with glue dyed black. I fine-tuned the heel surface angle. Finally, I just now have glued the fingerboard to the neck..... Tomorrow, I can finally carve the neck!!!

|
|
Felt good to get back to the building, but I think I just strained one of my rotator cuff muscles in the process, because it's hurting again now. Sigh. Gotta be a little bit more careful, I guess, in how I use that arm....or try not to use it at all (fat chance).
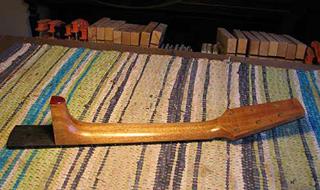
Spent this past week slowly carving the neck; it came out well. Today I spent a couple of hours fine-tuning the neck angle and neck set, by "flossing" (pulling sandpaper along) the heel surfaces that contact the body.
|
| |
|
|
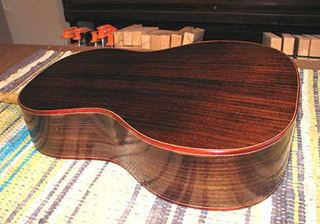
Next is doing the final fine-sanding of the entire guitar, followed by the grain-filling (Z-poxy). After that is done, it's time for the finish --- I have decided to try my hand at my very first French polish (shellac) finish! I've always wanted to try this out, and I figured that it might be a bit easier on this smaller-sized instrument. My soundbox has a really nice tap tone, so I imagine that the thinner French polish will bring out the sound even more. Who knows how it will turn out? We'll see. Should be fun.
|
|
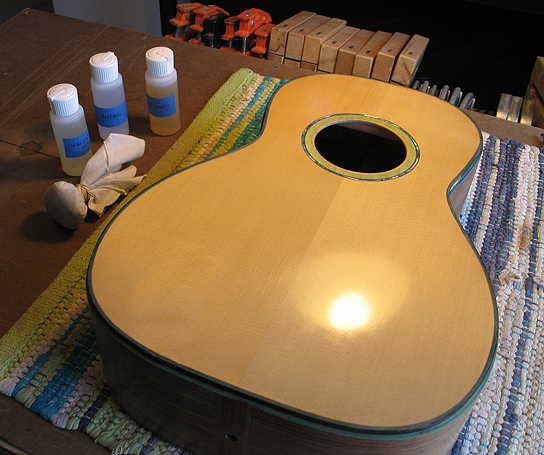
FRENCH POLISHING! Okay, I am definitely going to do the French polishing on my guitar! Today, while my guitar's first coat of the Z-poxy pore-fill is drying (it will probably take three coats), I have time to experiment with the French polishing process. I'm practicing on an older unfinished guitar body (seen below). It's the very first time I've tried this process.
Just finished level-sanding and laying on another coat (the third) of Z-poxy on the soundbox and neck. Tomorrow, I will level-sand it with 320-grit; hopefully, all the pores will be filled by then. If not, another coat should do it. THEN....I can begin the French polishing process!!! Yay!
|
|