A Size 5 Commission!!!
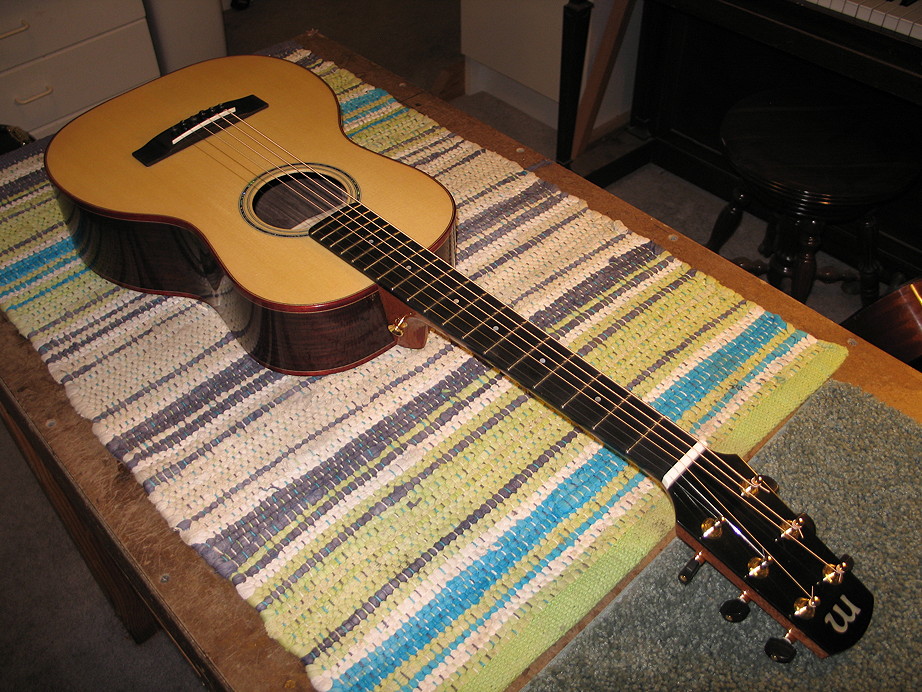
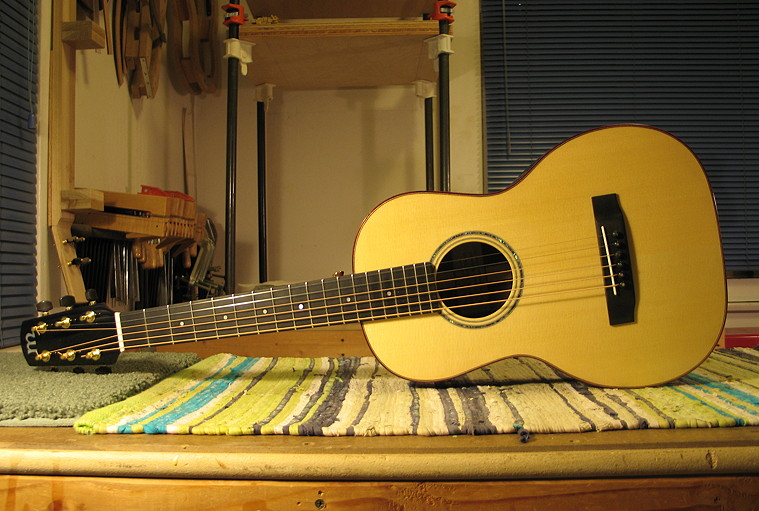
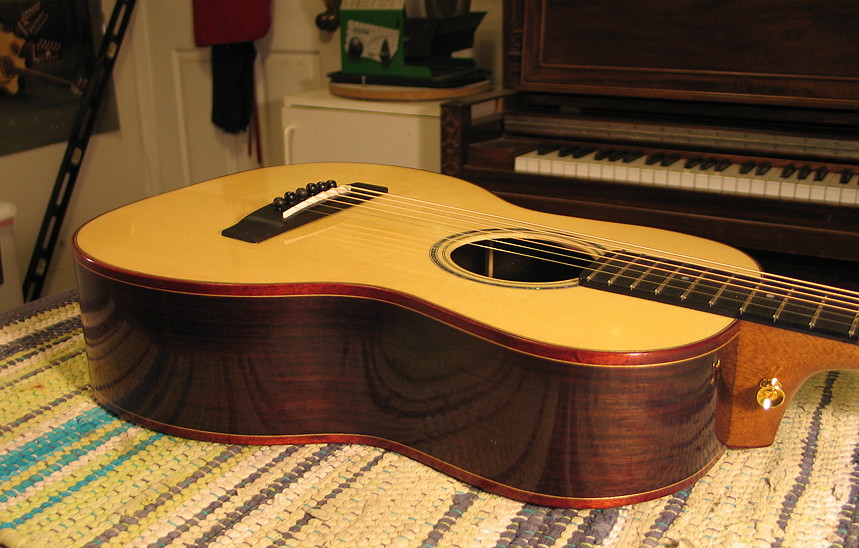
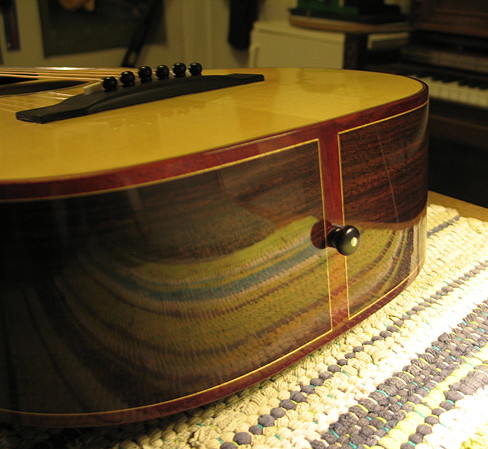
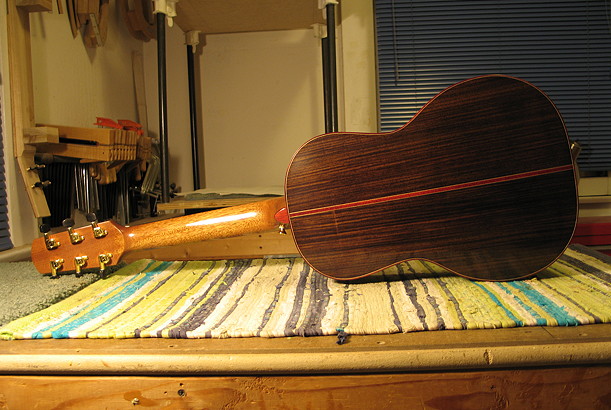
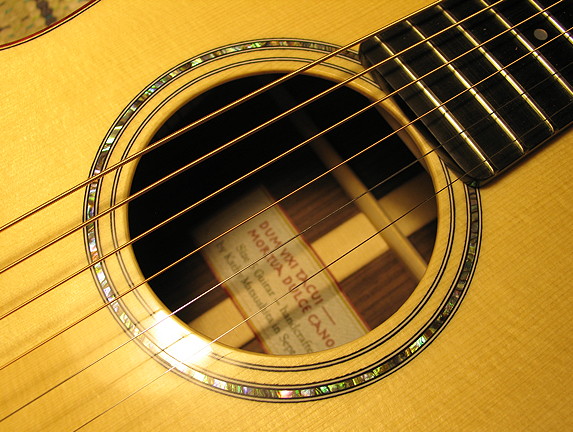
Sunday, October 21st, 2012: I just completed my very first post-retirement commission .... my fourth Size 5 guitar!!! As I've already chronicled the building of a Size 5 guitar, I didn't post pages as I built this one. However, here are a few photos of the final result. (Also, I've just put in a few new photos of the guitar with its new owner.) Scale Length: 21.3" (tuned 1-1/2 steps up, G to G). Approximate Dimensions: Body length = 16", Upper bout = 8-1/4", Lower bout = 11-1/4", Waist = 7", Body depth at tail = 3-7/8", Body depth at neck = 3-1/8", 12th fret at body. Materials and Finish: East Indian rosewood sides and back, Engelmann spruce top, ebony fingerboard and bridge, ebony peghead headplate, Honduran mahogany neck, bloodwood binding with white purfling on the sides and back and white/black purfling on the top, bloodwood backstrip with white purflings, bloodwood heelcap and end wedge, blue paua abalone Zip-flex strips for the rosette with black/white/black purflings, bone nut and saddle, ebony endpin and bridge pins with abalone dots, gold strap button on heel, gold Schaller mini-tuners with ebony buttons, mother-of-pearl logo on peghead, mother-of-pearl fingerboard position dots, Target Coatings' EM6000 waterbase lacquer with Z-poxy pore-fill. Had a few hiccups and re-do's along the way: (1) I had to redo the top, as I had some problems with gluing in the rosette strips when I used Titebond (purflings swelled up too much, and, in my attempt to get the purflings in, they didn't seat properly, and, in trying to fix that, I ended up thinning the top too much). I ended up using a different method of gluing the purflings in, with the second top --- I used thin superglue, after fitting the rosette strips in the channel perfectly (of course, after first sealing the channel with shellac so the superglue wouldn't wick into the end grain and stain the top). (2) The second problem I had along the way was having to bend a new set of sides after having cracked one of the sides in the upper bout when using the bending machine. The second set I bent by hand, just to play safe. (3) The third "challenge" I had was that, when I glued the fingerboard onto the neck with Titebond, there was a slight gap between the neck and fingerboard towards the heel end, because of insufficient clamping. I had to remove the fingerboard (first time I've done that), clean it all up, and reglue the fingerboard, this time with fish glue (first time using that, as well!!!). (4) Finally, the last problem I had (little in comparison to the others) was a little chip in the end of one of the bindings. I tried to fix it by filling it, but it was too noticeable, so I ended up just splicing in a new 1/2" section of binding (it's right at the top-end of the end wedge --- with the finish on, it's barely noticeable --- you'd only notice it if you were looking for it). In the end, it all came out very nicely! It sounds really good, has nice action, and the customer is pleased!!! And I learned a whole lot along the way . . . (And I got paid for it.)
Return to Home Page |
|
|
|
|
|
 |
|
|
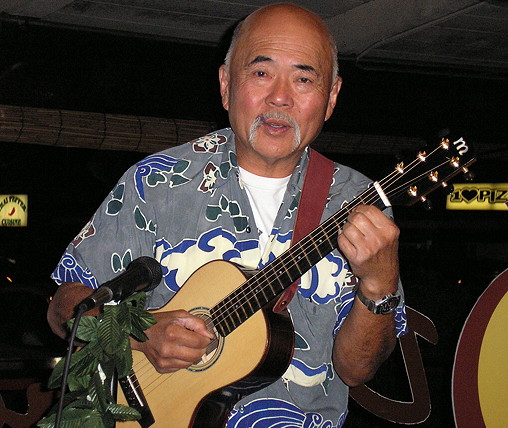
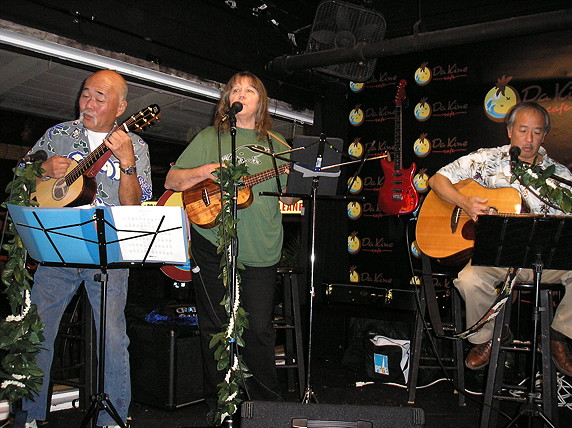
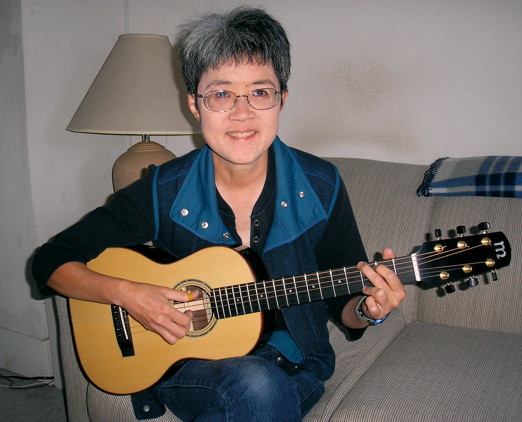
Here are a couple of photos of the new owner with his guitar. (Also, he insisted that he take a photo of me holding the guitar, as well!) |
 |
 |
|
 |